

Water, water everywhere…
Every summer, I embark on at least one backpacking adventure. Hiking and camping in the backcountry for several nights means having to find water along the trail — and I’ve learned (and taught!) enough biology to know that a handful of water scooped up from a seemingly refreshing trailside stream has a pretty good chance of sporting some protozoa or bacteria that could make the rest of the hike pretty miserable. So, in the name of leaving the Imodium in the bottom of your pack, here are six options for making non-potable water potable while you’re on the trail, including my new favorite, the Vapur Microfilter!
1. Carry your own clean water. Day hikers routinely toss a water bottle or two into their packs and don’t think twice about water after that. It’s a great option if you’re doing a short out-and-back trail hike, but I’ve seen lots of thirsty hikers on lots of different trails. We’ve also been on plenty of day hikes where it would’ve been nice to have a bit more water than we brought along. And carrying enough water for multiple days — at 8 lb/gal (1 kg/L) — is out of the question for me.

Hiking Zion National Park’s Virgin River Narrows
2. Boil the water you find along the trail. Boiling water effectively destroys protozoa, bacteria, and viruses, with the added bonus of separating out most sediment. But, it requires carrying a container to boil it in and either building a fire — not an option in many backcountry areas — or carrying a stove and fuel. While I’ve carried a stove & fuel on many backpacking adventures, the idea of collecting, boiling, and waiting for water to cool before drinking has never appealed to me.
3. Add disinfecting tablets to the water you’ve put in your bottles. Many backpackers use disinfecting tablets to purify water from streams, lakes, and rivers. The iodine-based tablets kill both protozoa and bacteria, and are one of the few ways to destroy viruses that may be present in water due to animal fecal waste. Still, I’ve shied away from these types of tablets due to their taste, opting instead for other options and seeking water sources with a low likelihood of containing animal fecal waste. Unfortunately, without any filtration, options #2 and #3 don’t remove any turbidity from the water before drinking it.

My backpacking buddy Marv pumping water in Kings Canyon National Park
4. Use a pump-style filter with a hose to pull water right from the source. Filtering minimizes turbidity and cloudiness, along with removing protozoa and bacteria. A pump draws water directly from a freshwater source (stream, river, or lake), attaches directly to a water bottle, and filters the water before filling the bottle. The MSR pump I’ve carried for years advertises a 1 L/min pump rate, which in practice seems optimistic. It’s easy — and important — to clean the filter regularly, as a clogged filter really slows down the filtration rate. Until my most recent backpacking trip, this was my go-to filtration system, as it attached to my Nalgene-style water bottles and allowed me to carry as much filtered water as my shoulders would allow.
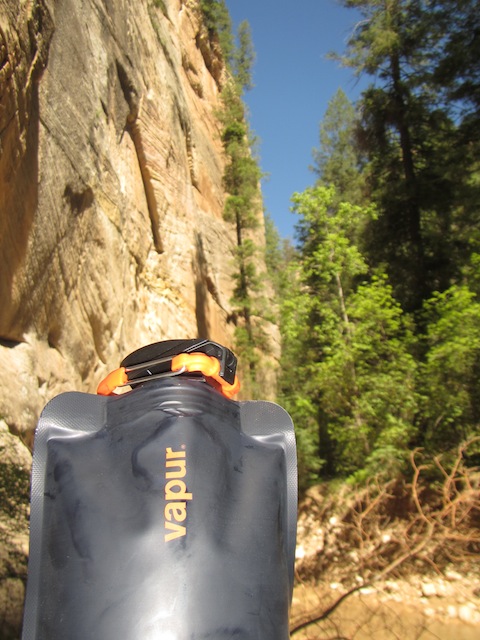
5. Use a suction-style filter to filter water as you drink it. Relatively new to the filtration game, a Vapur Microfilter combines the Vapur Anti-Bottle (a collapsible, reusable water bottle) with a straw-type filter. Simply fill the bottle with freshwater from any source and screw in the Microfilter. Suck the water through the filter and mouthpiece and you’re all set — no tablets, no pumping, no boiling, no carrying pounds of extra water. Its filtration efficiency exactly matches that of the MSR pump, and I find it very easy to use. I even use it as a pump to fill my Nalgene, Platypus, and additional Vapur Anti-Bottles — filling it with stream water and then squeezing the water out through the filter/straw/mouthpiece so that I can carry more filtered water without having to stop and refill.


6. Use ultraviolet radiation to purify the water in your bottles. UV radiation can destroy viruses and kill both protozoa and bacteria, and devices like the SteriPen Adventurer Opti can be placed directly into a water bottle to zap any undesirables (1 L of water per 90 seconds, reportedly). I haven’t tried this option, so I’m reserving judgment for now. Its upside appears to be virus removal and the flexibility to use it with a variety of containers, while its downside — along with options #2 and #3 — is its lack of filtration.
When it comes right down to it, how we backpackers treat our water is a matter of personal preference. Some opt for the most lightweight option (tablets), while others opt for the heavier options (boiling or carrying). Boiling, UV, and tablets are more effective at removing viruses, but don’t remove any particles like filters do. A combination of methods (filtration and UV, for example) may be the most prudent option, but since backpackers have been known to saw toothbrushes in half in the name of cutting weight, the extra weight involved in carrying two systems may be a dealbreaker.
For now, I’ll stick to using a suction-style filter such as the Vapur Microfilter. While it doesn’t remove viruses (just as my trusty pump filter didn’t — and I’ve never had any issues), its ease of use, light weight, and versatility (including the ability to use it to fill other containers) put it at the top of my list for my next backpacking adventure. After using it on a recent backpacking trip through the Virgin River Narrows in Zion National Park, I can’t see myself carrying a pump-style filter again.
Cheers!
Are you a backpacker? Day hiker? How do you stay hydrated on the trail? Let us know in the comments, and enjoy some clean, refreshing water on your next travel adventure, whether it’s for a week or a weekend!
Disclosure: Vapur provided us with two Microfilters in exchange for this review. However, all opinions are our own.
